
Learn how to poach an egg that is neat, tidy, and can be cooked up to three days before serving. Let me share with you the terrific method I've discovered to poach an egg!

Jump to:
A perfectly soft poached egg is great in Eggs Benedict, on Avocado Toast, or simply beside some bacon or sausage. If you have been following me on Instagram for any length of time at all, you'll have noticed that I've been experimenting with egg poaching.
I learned this amazing egg-poaching method from J. Kenji López-Alt in his book, The Food Lab: Better Home Cooking Through Science. He credits Heston Blumenthal of The Duck Fat, a restaurant in England, with introducing it to him.
My daughter, a cooking enthusiast herself, recommended this book to me. It's a huge textbook with recipes, but she got herself a hardcover copy and read it cover to cover. I downloaded the e-version and am enjoying it very much!
Just as I was struggling to master poached eggs, these instructions presented themselves. It was perfect timing!

Ingredients
- Water
- Salt - added to the water for flavour. Vinegar is unnecessary.
- Eggs - fresh eggs are best
For the exact amounts and detailed recipe instructions, scroll down to the end of this post, or click the Jump to Recipe button at the top.
Instructions
While these instructions are for only one egg, cook as many as will fit comfortably in the pan at the same time.
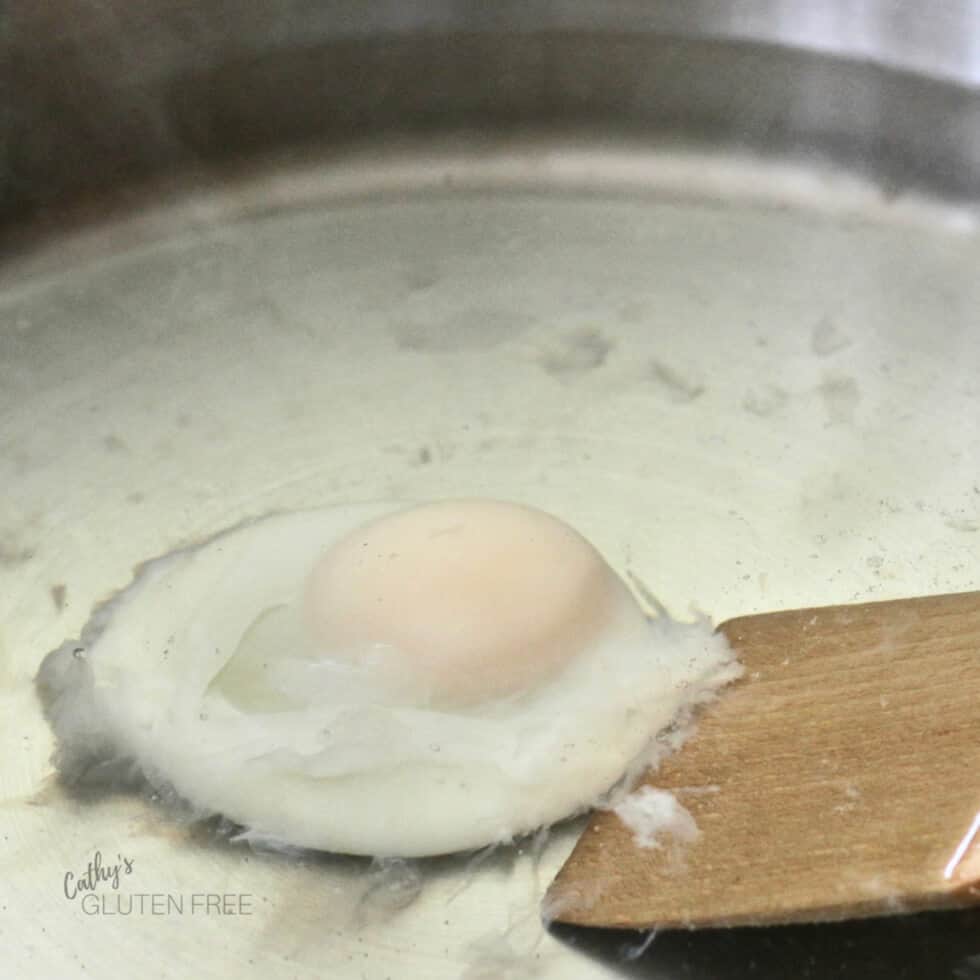
The secret to a nice, neatly poached egg is to drop the egg into a fine-meshed strainer before tipping it into hot water.
Don't let it sit too long in the sieve. It won't completely drain.
Somehow, the step with the sieve takes away the loose, messy part of the egg white, so it cooks up neatly.

Turn off the heat when the water has come to a boil. Add the egg gently.

Once the egg has been added, it can be moved around and even gently flipped over.
When the egg is done to your liking, lift it out with a slotted spoon.

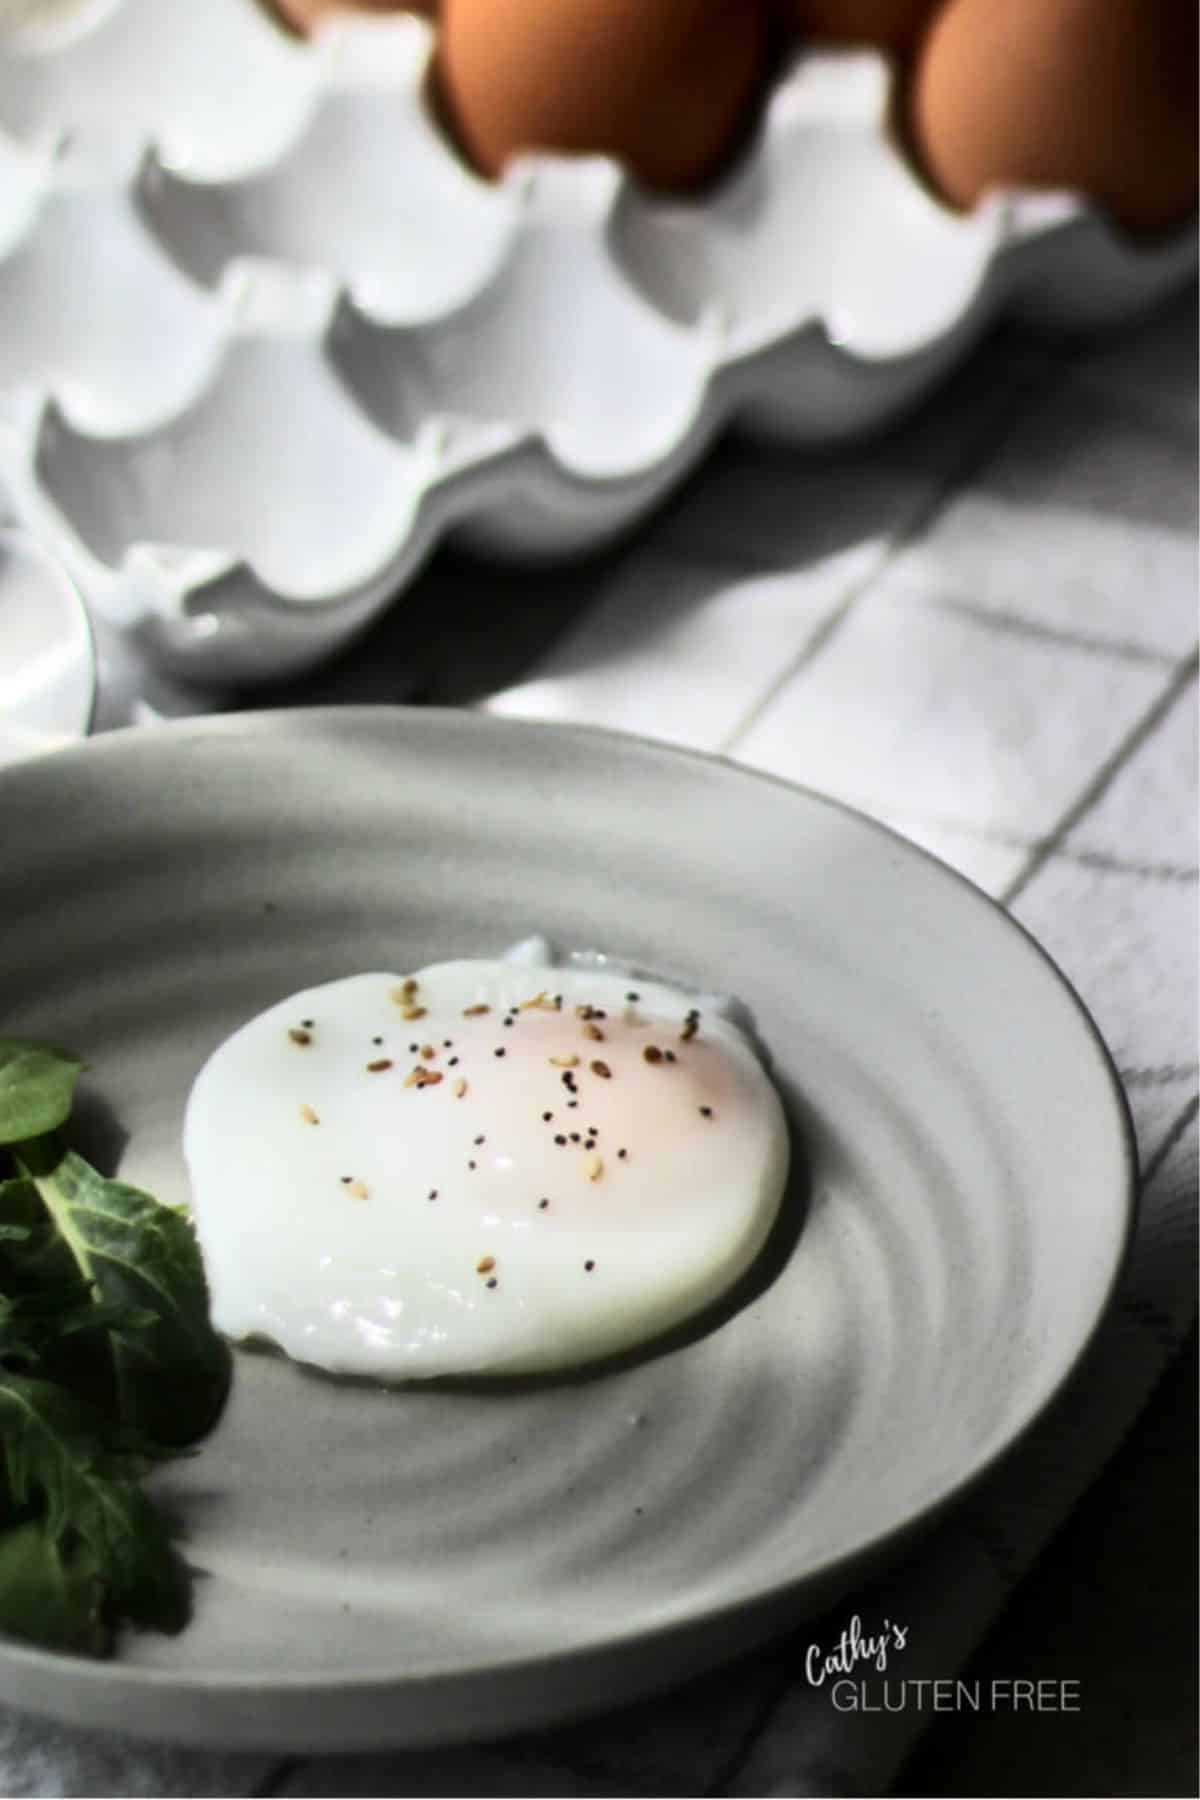
With practice, you'll get better and better at poaching eggs this way! I'm sure you'll find lots of way you like to serve them, but they're definitely good with Everyday Seasoning sprinkled on top.
Make Ahead Poached Eggs
You can prepare your poached eggs up to three days before serving them.
To do this, when you remove your cooked eggs from the hot water with a slotted spoon, transfer them to a bowl of cold water. Store them in the refrigerator.
When you're ready to reheat and serve them, transfer them to a bowl of hot water (140 degrees Fahrenheit) and allow to stand for 15 minutes.
You'll be able to serve several beautifully poached eggs to brunch guests with minimal last-minute effort!
Recipe FAQ's
1. Break the egg into a fine-mesh sieve.
2. Tip it gently into simmering water.
3. Move it around carefully until it's done to your liking.
4. Remove the egg from the water with a slotted spoon.
You do not need vinegar to poach an egg if you follow this method, using a sieve.
If you turn off the burner as soon as the water comes to a boil and then add the egg, it will poach in three or four minutes. This depends on how much you like your egg to be cooked.
Equipment
Good equipment makes any cooking task easier. You can poach eggs with minimal supplies.
- Large pot - Dutch oven or deep frying pan
- Sieve - a stainless steel sieve with fine mesh
- Lifter or long-handled spoon - for moving the egg around in the water
- Slotted spoon - to allow water to drip off as you lift the egg out
Storage
Store poached eggs in the refrigerator for up to 3 days in total. Count the days from when they were first cooked.
Top Tip
Once you have the method down pat, you can poach several eggs at one time. Add them to the water in an orderly fashion, and keep track of the time you added the first one. When you remove them in the order they went in, they should each be cooked for about the same time.
More Yummy Egg Recipes


Recipe

How to Poach an Egg
Equipment
- 1 Large pot
- 1 Fine-mesh sieve
- 1 large slotted spoon
Ingredients
- 3 quarts water
- 2 tablespoons sea salt
- 1 egg
Instructions
- Bring water and salt to a boil in a large saucepan.
- Break the egg into a small bowl.
- Tip the egg into a fine strainer.
- Turn off the heat as you gently lower the egg into the hot water.
- Keep your egg moving around in the water to keep it round. Gently flip it over, so it will cook evenly on both sides.
- When the poached egg is done to your liking, remove it with a slotted spoon.
Sue says
Why can’t you poach the egg directly in the strainer? Just hold it under water, should be easy to flip too. I’m going to try it,
Cathy says
That sounds like it would be easier. Let me know how it works out for you. Is it not difficult to clean out of the strainer then?
Riz | Chocolates & Chai says
Great tips, Cathy! A perfectly poached egg is a treat everyone deserves to make at home. Honestly, sometimes I forget that fried eggs are also an option because poached eggs are just perfection!
(Fun fact: most of my life, I was under the impression that fried eggs and poached eggs are the same thing! In the east, both terms were often used interchangeably to describe fried eggs!)
Cathy says
How interesting about the terms being used interchangeably! Now that I've discovered this method of poaching, I'm excited about cooking eggs ahead and warming up perfectly poached eggs for guests!
Denise from Urb'n'Spice says
Those are awesome tips, Cathy! I will always find an excuse to make poached eggs for breakfast, brunch or lunch so I will definitely be trying your tips soon. The poached egg looks so tidy when it is done! Thanks for sharing. 🙂
Cathy says
Thanks, Denise. I hope you find these tips helpful.
Diane Galambos says
Cathy, you explain this so well - and the pics are great, as well as the video!
Cathy says
Thank you, Diane!
Nicoletta @sugarlovespices says
Poached eggs are Loreto's domain 🙂 . I found your instructions very helpful, especially the video, and one day I am going to surprise him by making the perfect poached egg, like the one you have here!
Cathy says
You go, girl!
Lisa says
Your method of poaching eggs actually seems like I might be able to do it and not end up with some weird unwanted egg swirl water in my pan! Can't wait to try this!
Cathy says
It's not difficult. You might still get some extra egg bits, but your main egg will come out fairly smooth looking.