
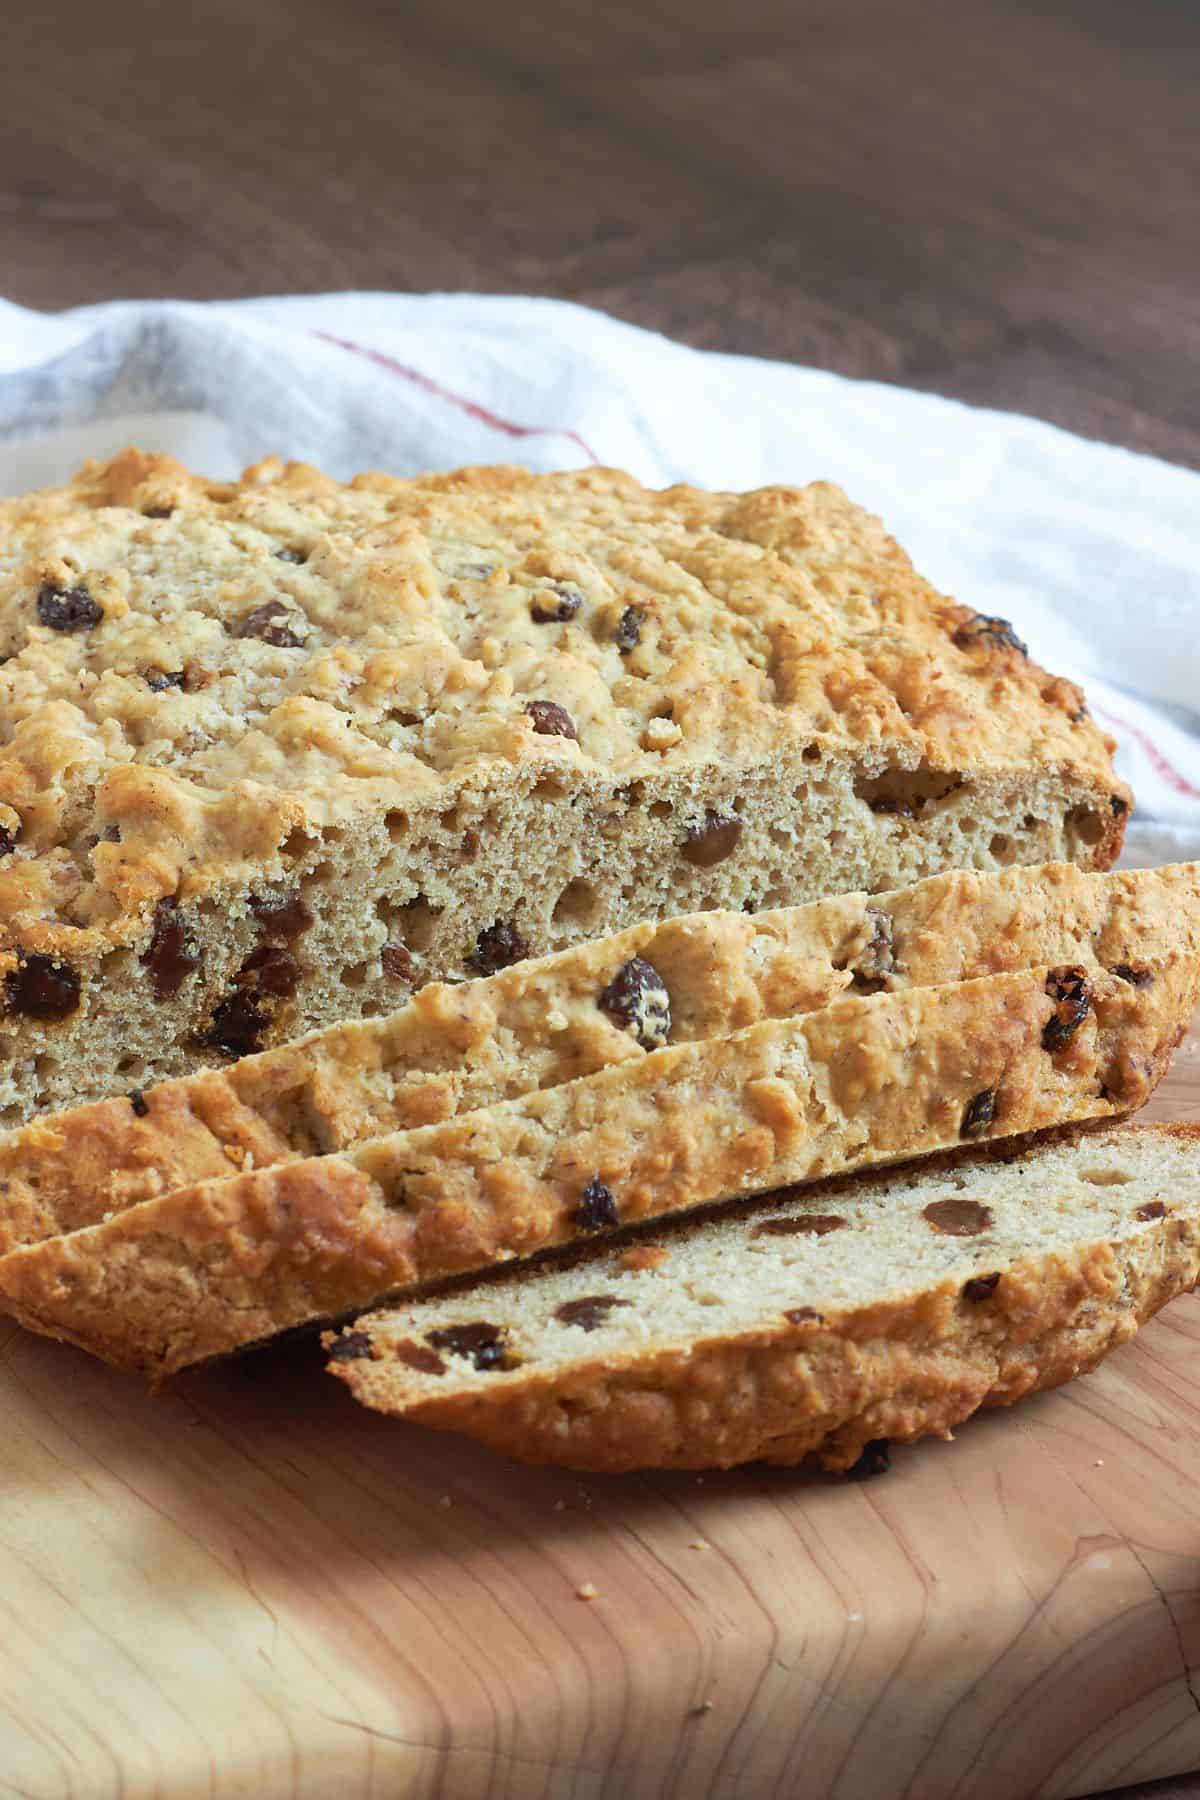
This gluten-free Irish Soda Bread is a simple, quick bread that's easy to make. It's a slightly sweet, no-knead, loaf with a soft, moist crumb inside the crunchy, golden crust. Instead of yeast, it relies on the reaction between buttermilk and baking soda to rise.
One reader, Jeremy, commented: "A winning recipe! Delicious and texture and crust is so fantastic...⭐️⭐️⭐️⭐️⭐️"
Jump to:
How I Developed This Irish Soda Bread Recipe
As with most of my bread recipes, I made several attempts at this one before I achieved a result that I was truly happy with. Don't get me wrong; they weren't terrible, and my family was happy to eat them. However, I had hoped to do better, and finally I did.
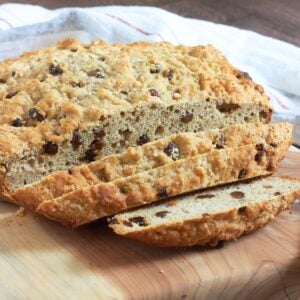
Since traditional Irish soda bread is not made with yeast, I naturally used my Gluten-Free All-Purpose Flour for my first test batches. The problem that I kept having, no matter how long I cooked it and even when I preheated the skillet, was a gummy layer just above the bottom crust. Realizing that Irish soda bread should be more crumbly than gummy, I decided to try it with my Gluten-Free Bread Flour. That time, it turned out great! The bread flour produced a loaf with a golden crust on the outside and a soft, moist crumb on the inside. It also has the slight sweetness typical of Irish soda bread. And, it doesn't fall apart in dry crumbs as some gluten-free baked good do!
So, even though my bread flour blend was designed to work with yeast breads, and this bread has no yeast, it worked great. This gives me more "food for thought" (pun intended) for future recipes!
Another benefit of using my bread flour in the recipe is that it doesn't need xanthan gum to hold it together. The rise comes from the reaction that occurs when buttermilk meets baking soda rather than from yeast. Psyllium husk in the flour holds the bread together, so xanthan gum is unnecessary.
Gluten-Free Irish Soda Bread Ingredients
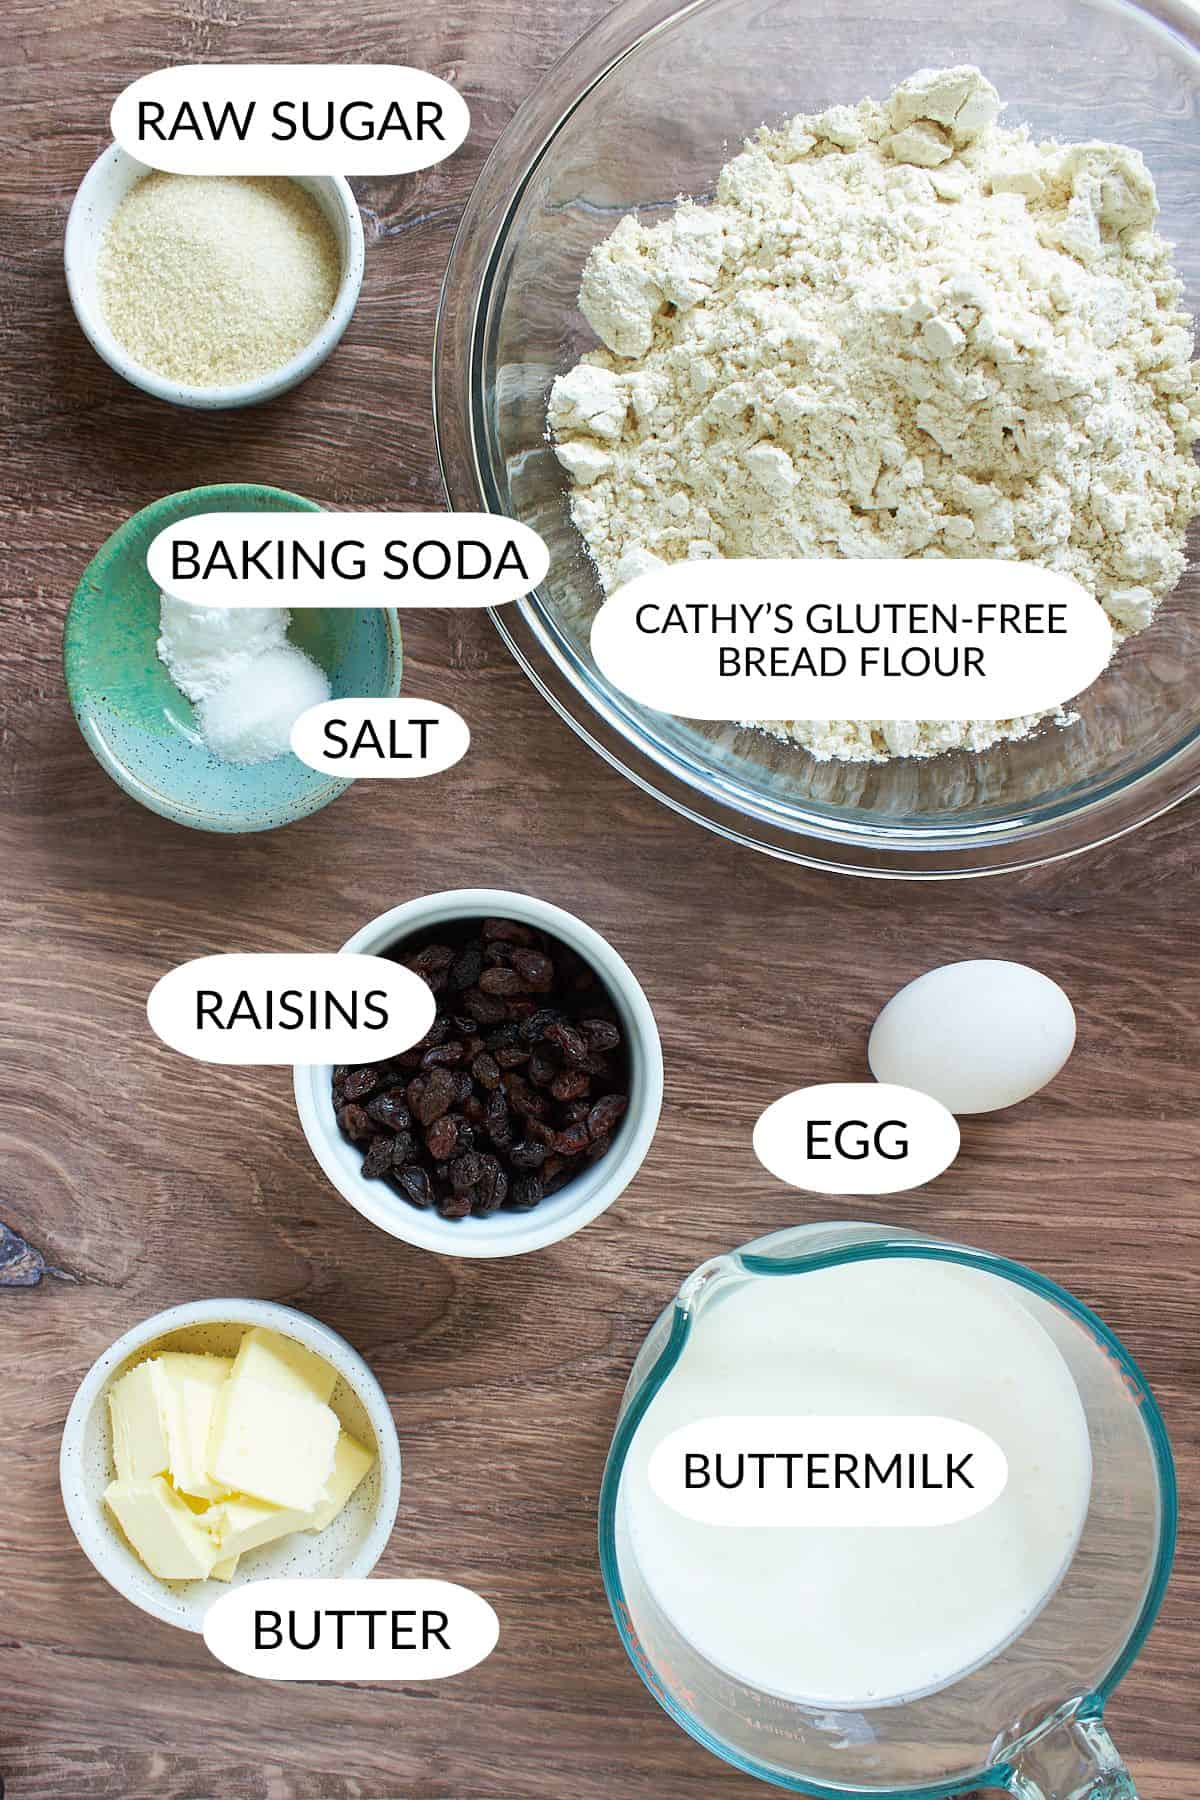
- Cathy's Gluten-Free Bread Flour - This is the blend that gives the quick bread the perfect texture!
- Buttermilk - When combined with baking soda, it causes the dough to rise well. If you don't have buttermilk, mix 2 tablespoons of white vinegar or lemon juice with whole milk, stir, and let sit for 5 or 10 minutes.
- Raw Sugar - I prefer raw sugar, but if you use white sugar, that should work here.
- Baking Soda - This is essential for the chemical reaction with the buttermilk. There's no substitute for it, unless you change the recipe completely.
- Butter - Your butter should be nice and cold.
- Raisins - optional, but highly recommended! You could also substitute dried currants, which would be traditional.
How to Make Gluten-Free Irish Soda Bread
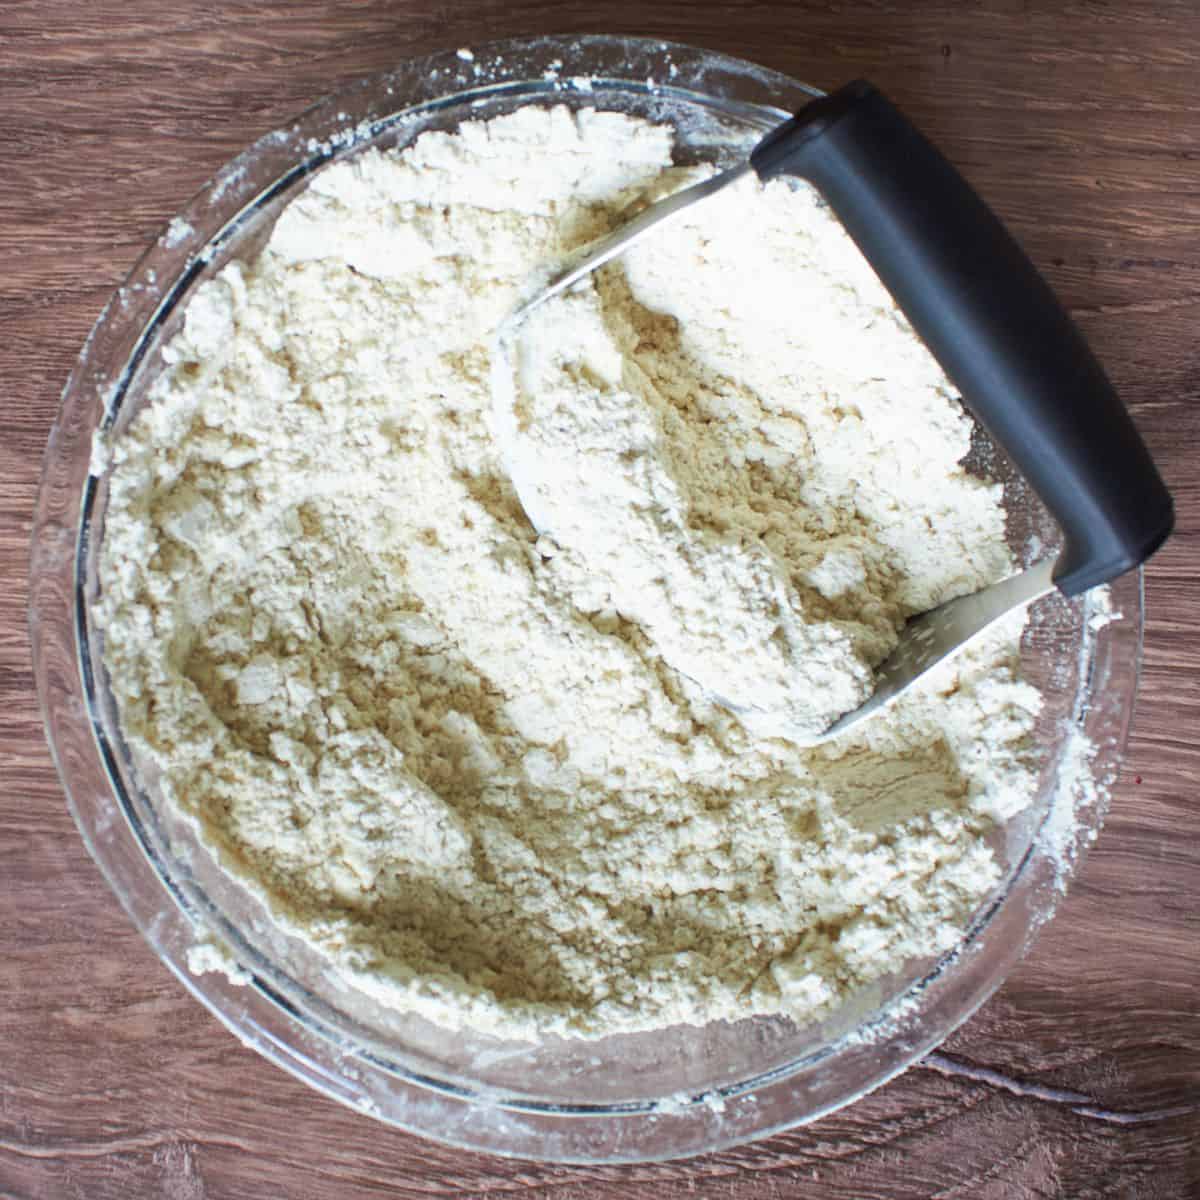
Whisk together dry ingredients and cut in cold butter.
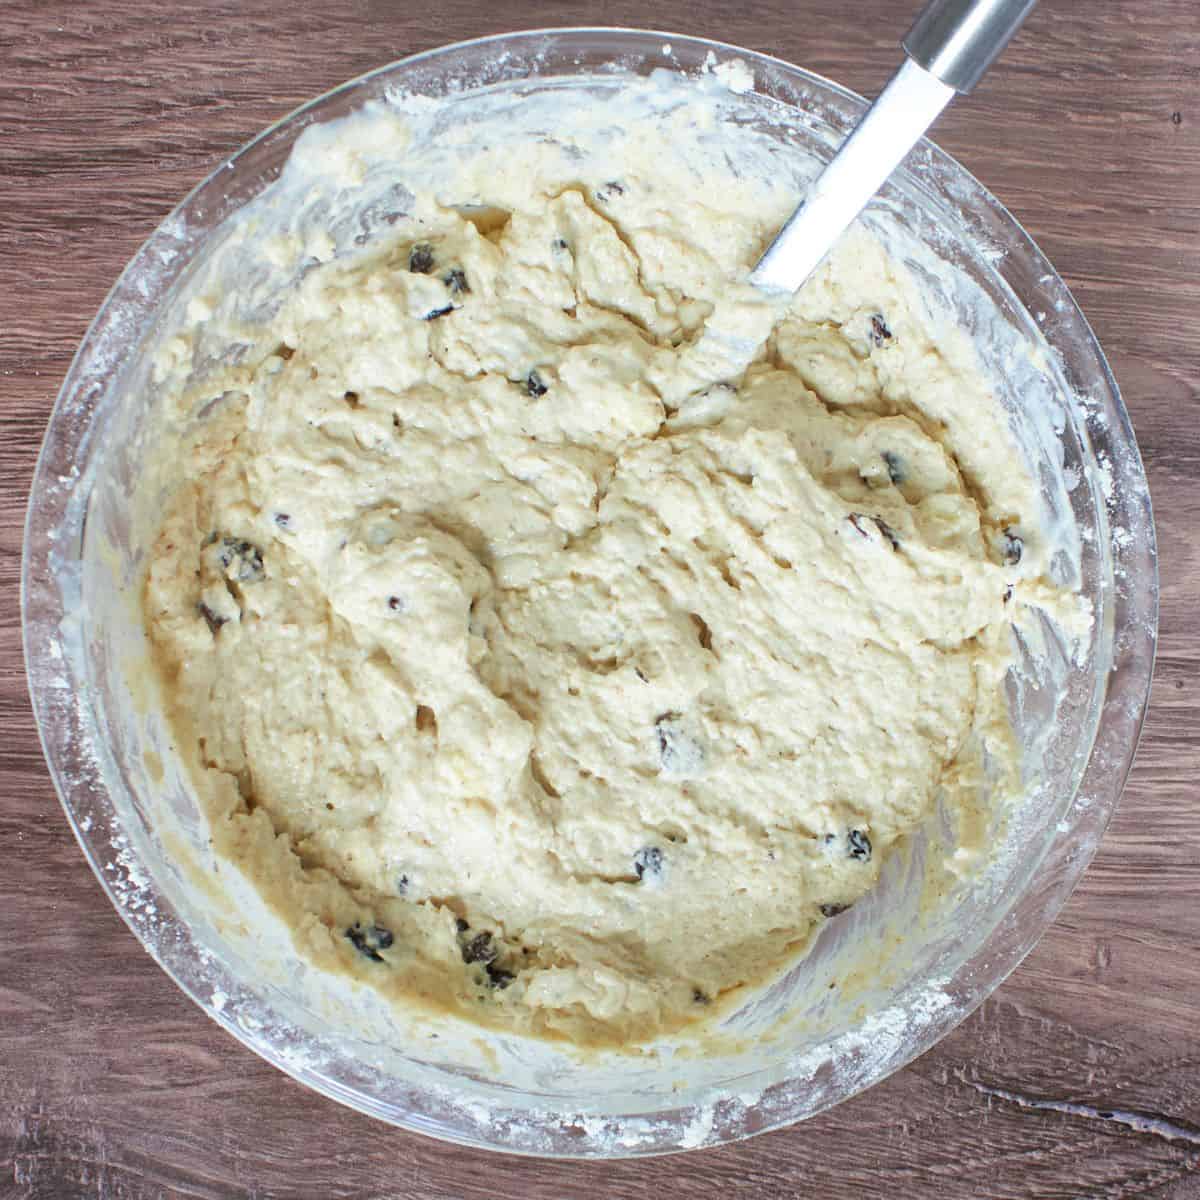
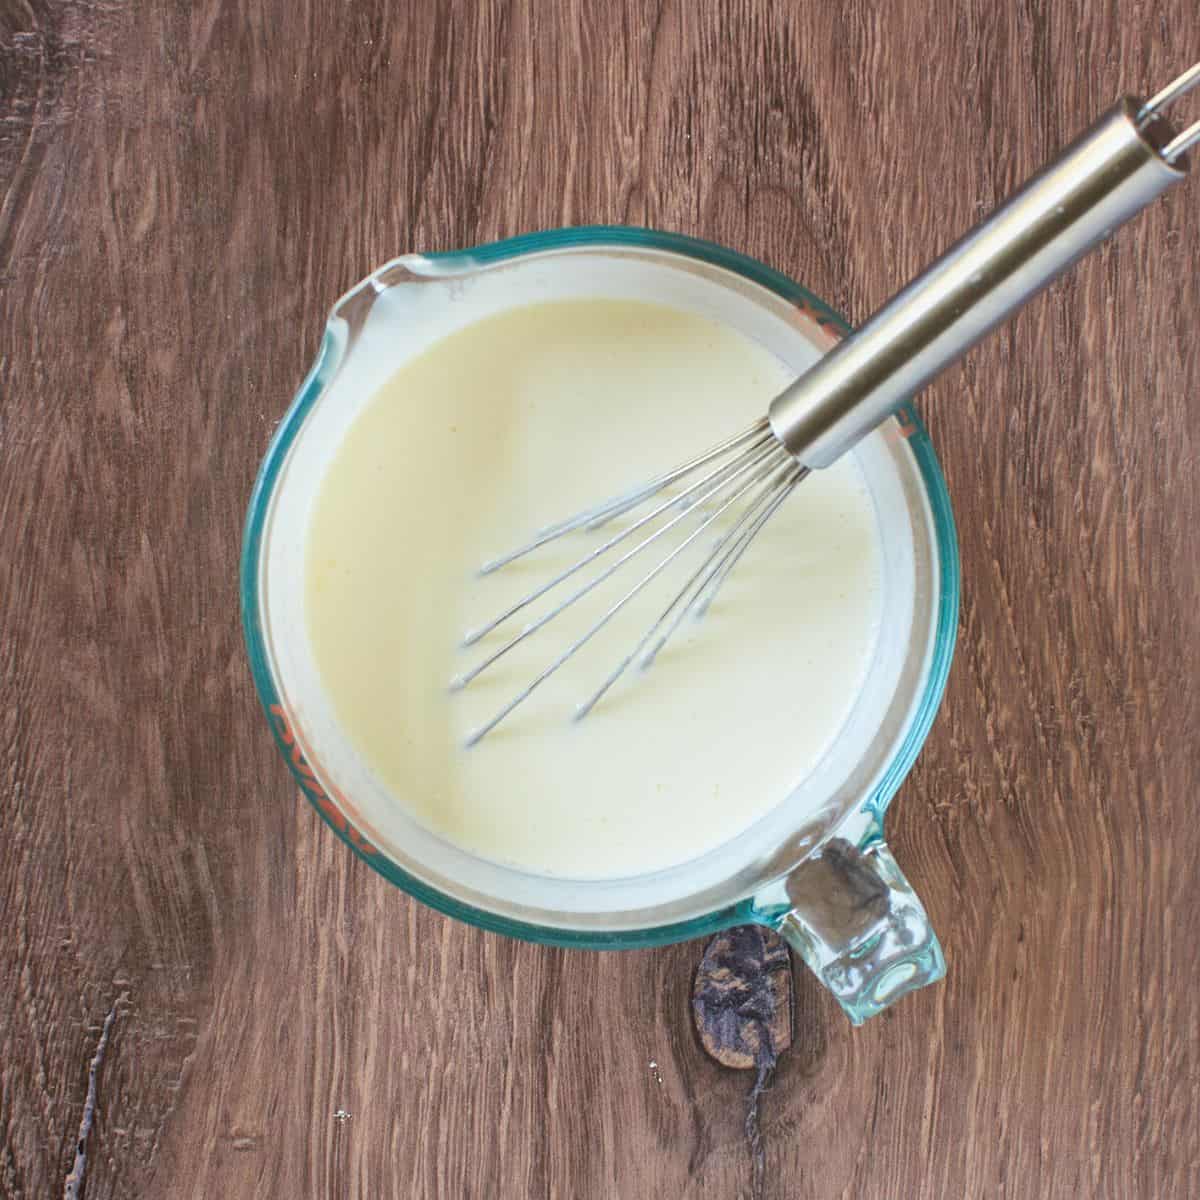
Whisk an egg and the buttermilk together.
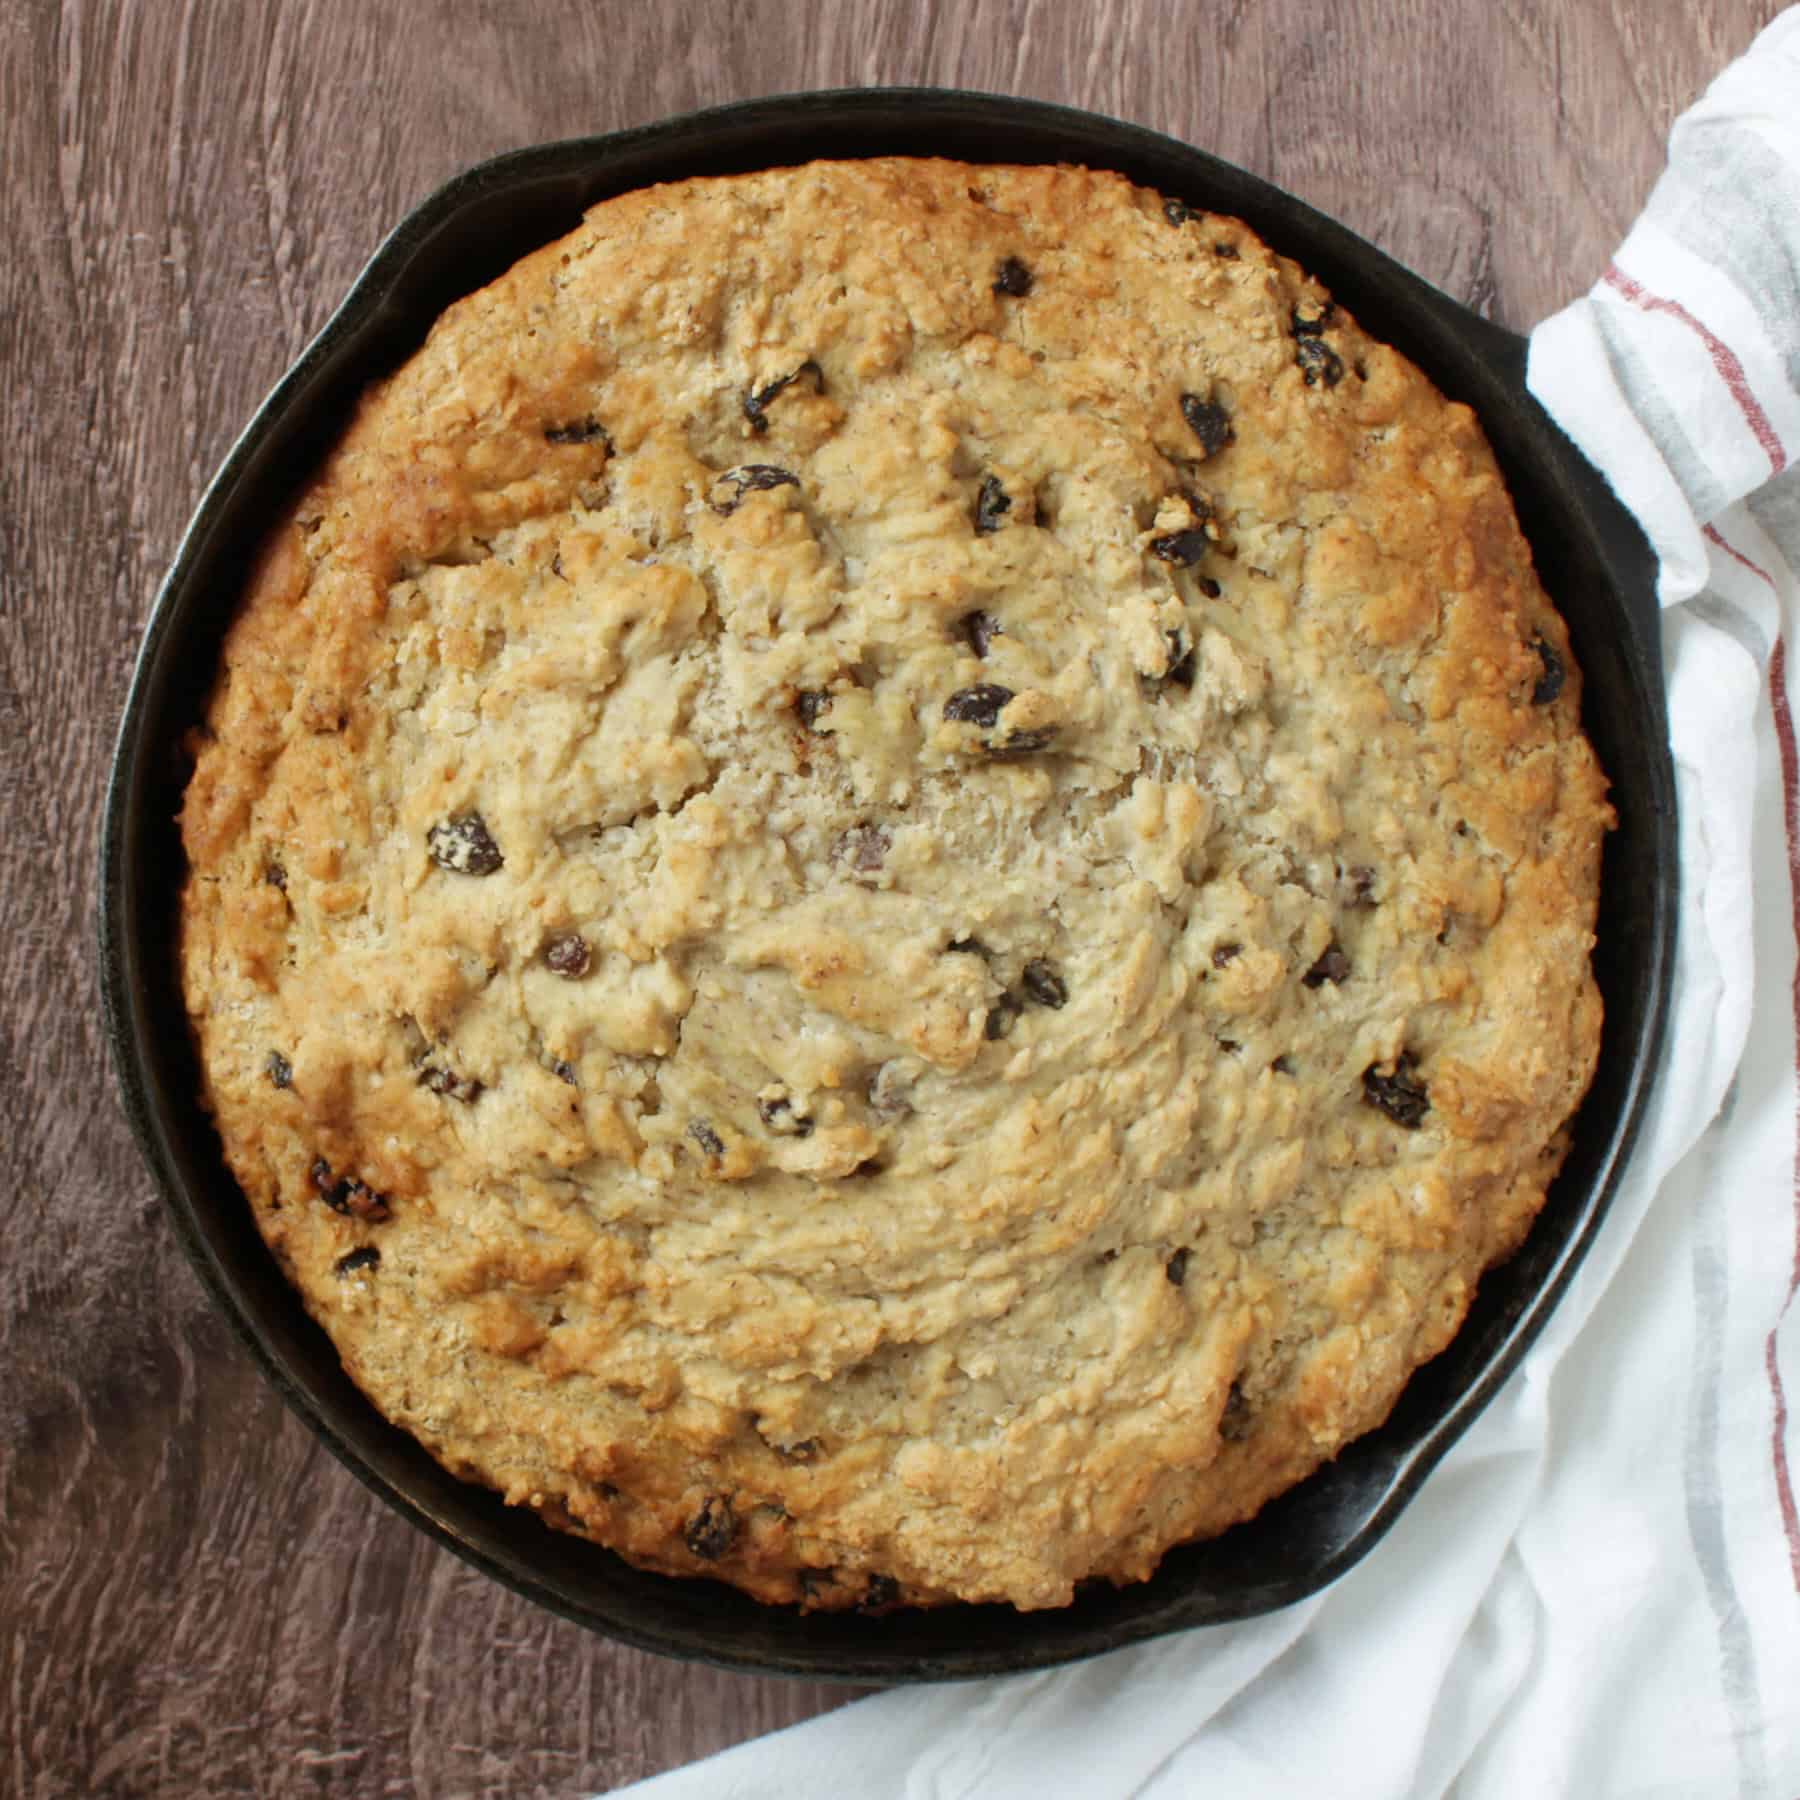
Combine the dry mixture with the buttermilk mixture. Stir in raisins, and bake in a preheated, oiled, cast-iron pan.
Should my gluten-free batter be allowed to rest before baking?
No. Usually, resting gluten-free batter is recommended. However, letting your batter sit before baking is not a good idea here, because this recipe relies on the chemical reaction between baking soda and buttermilk for rise and lift. If you let the batter sit, most of that leavening power is spent before it ever hits the oven, and you'll end up with a denser, flatter result.
How does gluten-free soda bread rise without yeast?
When buttermilk (acidic) meets baking soda (alkaline), they react immediately, producing carbon dioxide bubbles. Those bubbles are what make your baked good rise and stay light.
Gluten-Free Vs Regular Flour Baking
Gluten-free batter usually has a higher moisture content than regular dough. For my first test batches of this Irish soda bread, I was able to cut the traditional "X" pattern across the top. By the time I reached the recipe that produced this nice, moist, soft-crumb loaf, the batter was too soft to hold the "X." I would rather have moist gluten-free bread than have it look exactly like the traditional one and be dry and hard or falling apart.
Storage
Once it has cooled completely, store gluten-free Irish soda bread, sealed in an airtight container at room temperature for up to a couple of days. If I plan to keep it longer than that, I slice it and freeze it. Individual slices toast nicely when you're ready to eat them.
Equipment
Traditionally, Irish soda bread is baked in the oven in a cast-iron skillet for beautiful, crusty results. I have inherited several cast-iron skillets. This is nice, because the old ones really seem to be better than new ones. They have a nice, smooth surface on the inside, not pebbly at all. If you have not been as fortunate, you might look for them in garage sales and thrift stores. No matter how awful they might look, they can be cleaned up and seasoned to be as good as better than new!
(As an Amazon Associate, I earn from qualifying purchases.)
If you can't manage to locate an old cast-iron skillet, a new one is better than none at all.
Recipe
Gluten-Free Irish Soda Bread
Equipment
Ingredients
- 4¼ cups Cathy's Gluten-Free Bread Flour
- 3 tablespoons raw sugar
- 1 teaspoon baking soda
- 1 teaspoon fine sea salt
- 5 tablespoons cold butter cut into chunks
- 2½ cups buttermilk
- 1 large egg
- 1 cup raisins or currants
Instructions
- Grease a 10-inch cast-iron skillet and place it in the oven. Turn on the oven to preheat to 400℉ (204℃).
- In a large mixing bowl, whisk together the flour, sugar, soda, and salt.4¼ cups Cathy's Gluten-Free Bread Flour3 tablespoons raw sugar1 teaspoon baking soda1 teaspoon fine sea salt
- Cut the chunks of butter into the flour mixture, so it is easily distributed in barely noticeable pieces. Use a pastry cutter or two knives.5 tablespoons cold butter
- Whisk the egg and buttermilk together in another container.2½ cups buttermilk1 large egg
- With a large spoon, stir the liquid buttermilk mixture into the dry flour mixture until it is evenly incorporated. Stir in the raisins or currants.1 cup raisins or currants
- Transfer the dough into the hot, prepared skillet and put it into the oven. Bake for about 55 minutes, until it tests 210℉ in the center with an instant-read thermometer. Cover the bread with foil for the last 30 minutes of baking to keep it from getting too brown.
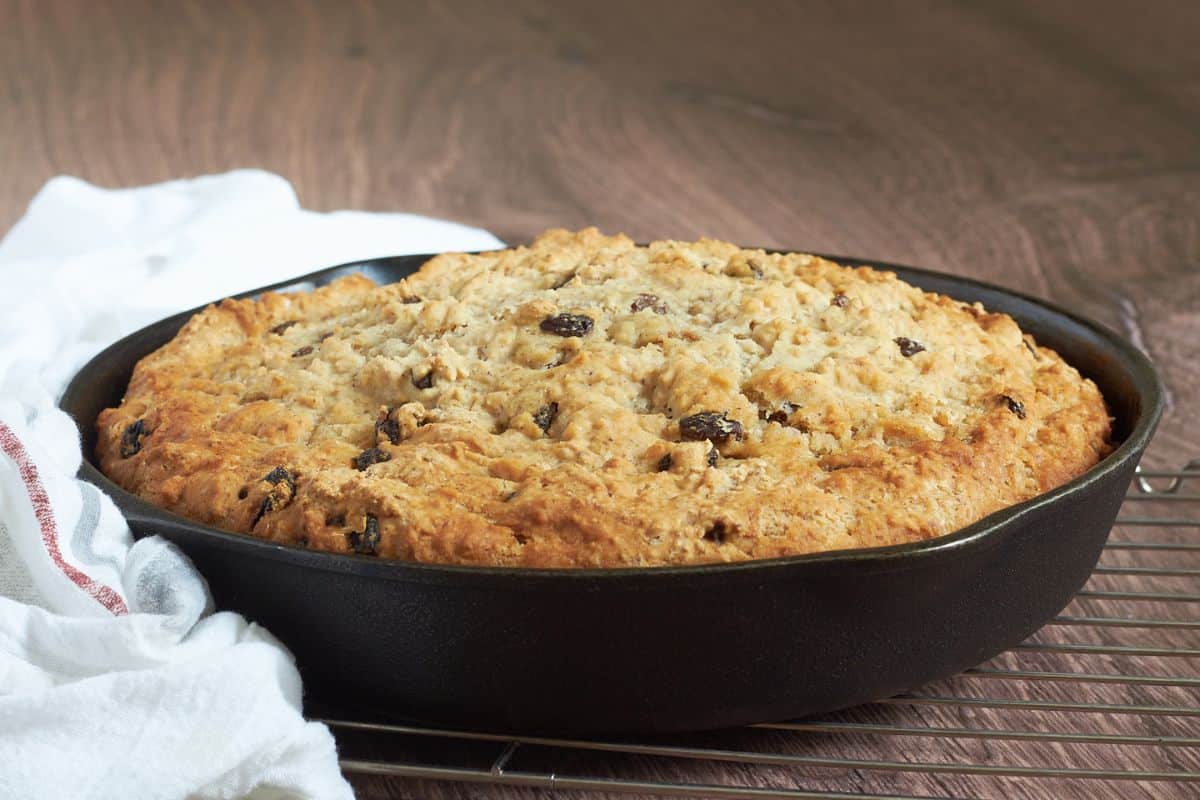
- Set it to cool on a wire rack for about 30 minutes before slicing. You may remove it from the skillet after about 10 minutes of cooling.
Cathy Brak says
We love this, especially with raisins!
Jeremy says
A winning recipe! Delicious and texture and crust is so fantastic. I baked it in my stainless steel pan (because I don't have cast iron) with extra generous greasing on the pan to compensate for possible sticking.
Cathy Brak says
Thank you, Jeremy! I'm happy to hear that it works in a stainless steel pan, too.