
Make this natural face cream for daily use at home on your stovetop! It's rich and creamy, absorbs nicely without a greasy residue, and gives us homemade skin care for day and night.
This recipe is a departure from my usual, edible gluten-free ones, but it has been so handy for me that I decided to share it with you.

I always look for natural skin care products without harmful ingredients. This creation was inspired by a cream that I used to buy from a girl in Canada when I lived there. As time passed, I was spending less time there and more time in the States, and her jars became smaller and higher priced. I studied the ingredients list on the label and decided to try to make my own.
This homemade face moisturizer is great for aging skin, so if you're looking for a face cream for wrinkles, this is it! However, it's good for anyone with dry or sensitive skin, too!
I ordered the ingredients from Amazon and through much research and experimentation, I have landed on a cream that I enjoy using and that saves me a lot of money in the end. Once I figured out the proportions of ingredients that work best, I found this recipe quick and easy to make.
Gather Your Ingredients
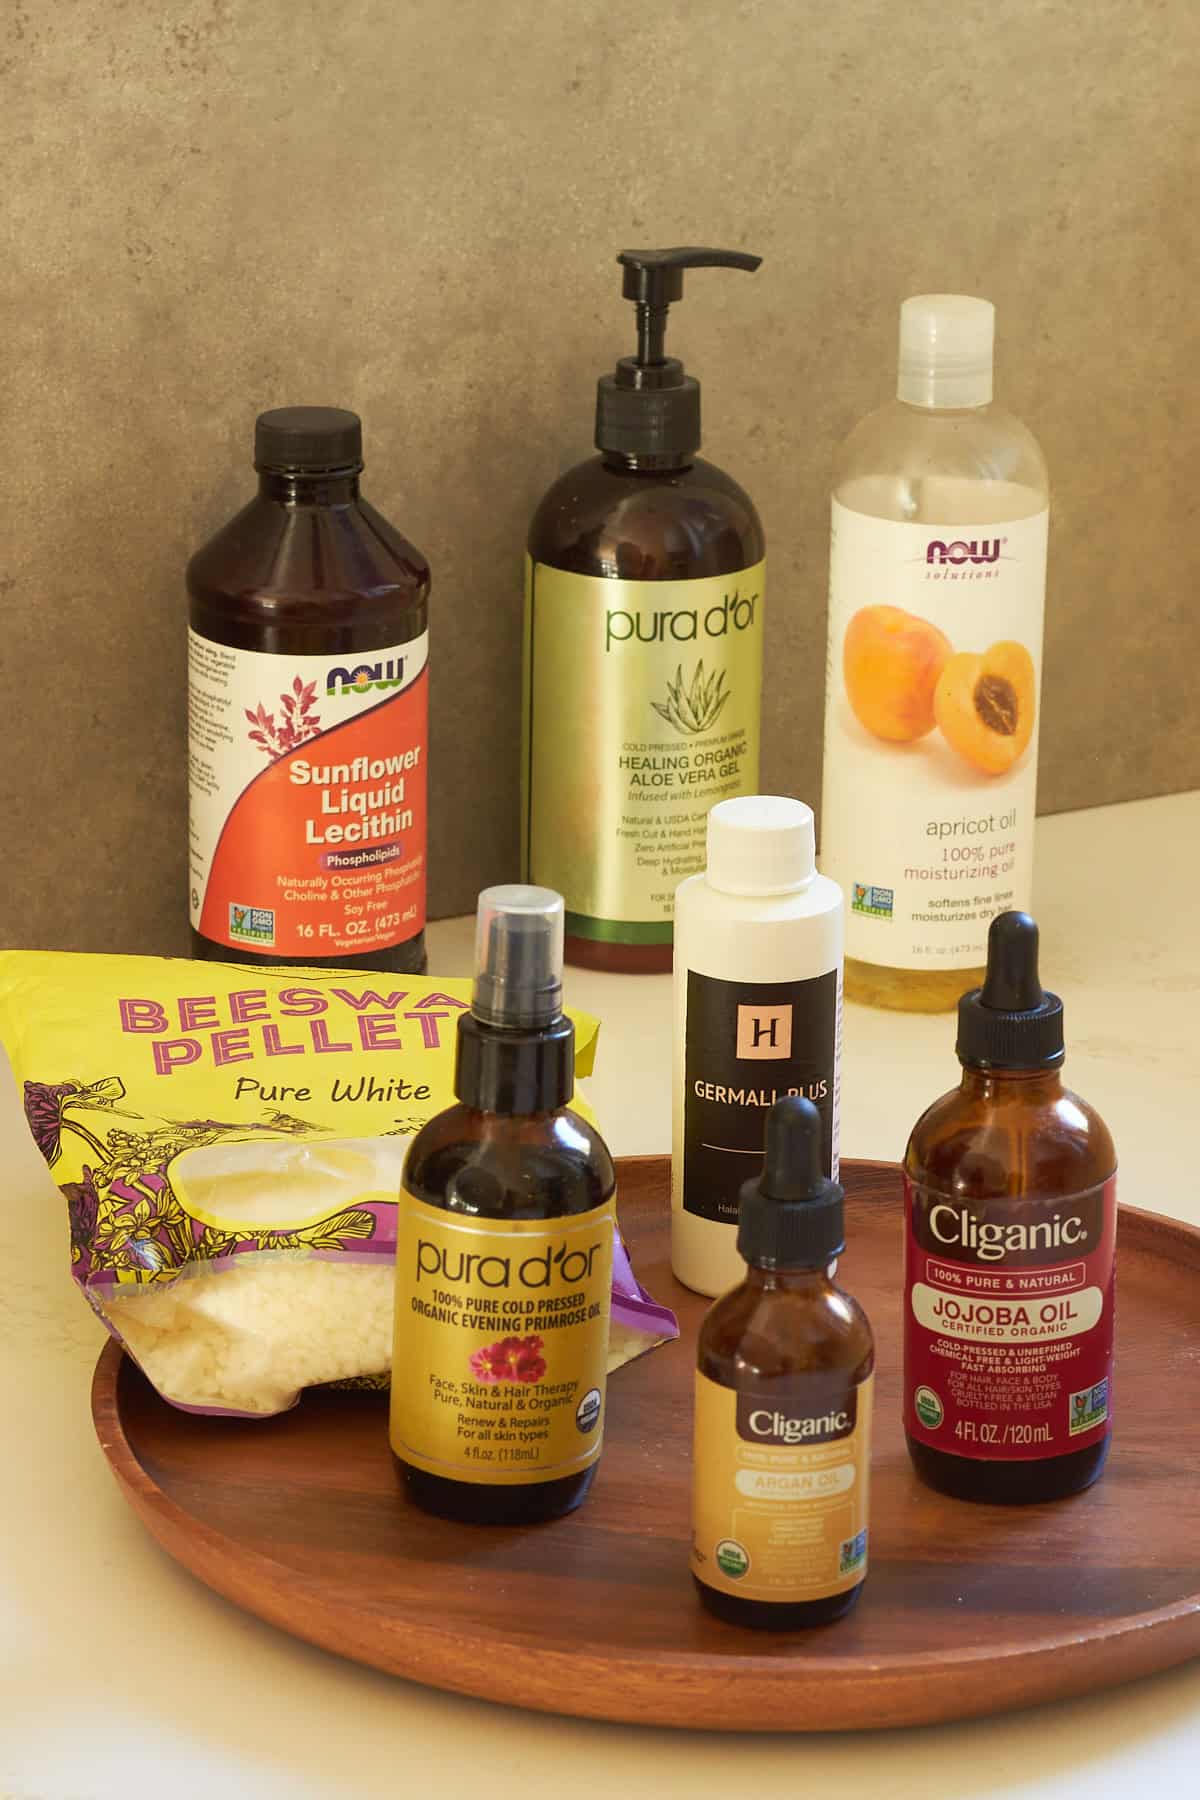
- Beeswax pellets - made from beeswax created by honeybees during their honey-making process. Besides forming a breathable, protective shield on our skin, it helps to extend the shelf life of our products naturally due to its antibacterial and germicidal qualities.
- Apricot kernel oil - extremely nourishing for the skin with essential fatty acids
- Argan oil - an edible oil that's prized for its lightweight hydration
- Jojoba oil - an oil that's close in composition to the skin's own normal oil
- Evening primrose oil - contains essential fatty acids and has anti-inflammatory effects on the body
- Lecithin - an emollient, emulsifier, and water-binding agent that comes from plants
- Germall Plus - a preservative used to inhibit the growth of bacteria, yeasts, and molds
- Aloe vera gel - a wonderful, soothing gel that gives our cream a nice consistency

Substitutions
I don't make any substitutions in this recipe. Getting the proportions and procedure right was such a tricky process that I don't want to mess with it now!
Step-by-Step Instructions
Set a Pyrex (heat-safe) bowl to heat over a pot of simmering water. I made an extra-large batch when I shot these photos and should have used larger containers.

1. Measure the beeswax into the heated bowl and whisk as the pellets melt.

2. Wait until the beeswax pellets have melted completely before adding any other ingredients.

3. Whisk in the oils, one by one.

5. Continue whisking until you achieve a nice, smooth texture.

4. Remove the pot from the heat and quickly whisk in the remaining ingredients.

6. Scoop the skin cream into a clean jar and use on your face and body.
Hint: Whisk the cream vigorously, once the beeswax pellets have melted, to completely and smoothly incorporate the other ingredients before the pellets cool and become hard again.
Recipe Notes
I experienced a lot of trial and error while developing this recipe. I knew which ingredients needed to be predominant by weight. However, beyond that, I had to experiment with exact proportions and figure out a process that works.
I've been making and using this face cream for a few years now. Occasionally, I've had a batch with a few little hard bits in it. That's why I caution you to keep the mixture warm, keeping the beeswax melted until everything is mixed together.
Expert Tips
To prevent lumps, use a bowl that's larger than you need in a saucepan that's big enough to hold it. If any of the mixture cools around the edges before the beeswax is fully incorporated, it will turn into little hard bits. The key is to have lots of the warm bowl exposed to heat beyond the top of your mixture so nothing is cooling too quickly around the edges before it all gets mixed in.
Tips for Use
The cream that inspired this recipe is used as a daily moisturizer and night cream for the face. Now that I'm saving money by making my own, I love to use it all over my body.
Storage Tips
This skin cream keeps well in a dry cupboard at room temperature. If it gets too hot, it will melt and need to be mixed again. If you have more than you will be using up regularly, it wouldn't hurt to store it in the refrigerator.
Freezer Instructions
I don't see any need to freeze the product and don't recommend it.
How to Prep Ahead
It's important to have all your tools, measuring spoons, and ingredients set out and ready to go so you can add them quickly when the time comes.
Recipe FAQ's
You can make your own skincare with quality natural ingredients, measuring spoons, a double boiler setup, and a whisk. Apply just enough heat where necessary, but remove your mixture from the heat as you add delicate ingredients.
Apricot kernel, argan, jojoba, and evening primrose oil are lovely for the skin, so they're great to use in homemade skin care.

Helpful Equipment
To make your skin cream, you'll need a Pyrex bowl and a saucepan it will sit in over water. You will also need a whisk and measuring spoons.
One of the best ways you can help others to find good recipes and support your favorite food bloggers at the same time is by commenting and rating the recipe... Thank you!
Recipe

Skin Cream
Equipment
- 1 saucepan that will hold Pyrex bowl suspended above water
- 1 Whisk
- Measuring Spoons
Ingredients
- 4 tablespoons beeswax pellets
- 2 tablespoons apricot kernel oil
- 4 teaspoons argan oil
- 2 teaspoons jojoba oil
- 1 teaspoon evening primrose oil
- 2 teaspoons lecithin (Shake well before pouring.)
- 14 - 18 drops germall plus
- 4 tablespoons aloe vera gel
Instructions
- Measure the beeswax pellets into a pyrex bowl set over simmering water as a double boiler, whisking constantly with a silicone whisk.
- When the beeswax has melted, with the bowl still over simmering water, continue to whisk as you add the apricot kernel oil, argan oil, jojoba oil, and evening primrose oil one by one.
- Remove the bowl from the heat. Stirring constantly, add the lecithin, germall plus, and then the aloe vera gel.
- Keep whisking until the cream reaches a nice smooth consistency.
- Store your cream in a glass jar at room temperature.
Video
Notes
- Store the individual ingredients for this skin cream in the refrigerator, but remove them an hour before making the cream to bring them to room temperature.
- Shake the lecithin well before measuring it for the recipe.
- Temperature is very important to this procedure. If anything (including the air of the room) is too cold, the cream won't mix well. If it's too hot, the integrity of the ingredients could be damaged.
Tulsi says
Thanks for breaking this down clearly.
Cathy Brak says
Oh, you're welcome! That is what I aim to do.
Rahul Sharma says
I always learn something new here.
Kath says
Hi what is the consistency of ot like? Is it soft and fluffy like a cream?
Cathy Brak says
I would certainly describe it as soft, maybe not fluffy. It's not as runny as most hand lotions. It's a very nice scoopable cream.
Cathy says
I always use this cream, night and day.